You reach this function via the tree of functions by choosing
“Inventory Management/More/External Data Bases/MS Access connection”.
On the installation CD or in the downloaded installer package, you will find a prepared ACCESS-database in the folder ”MSAccessExport“. To establish a connection to an Access database, you need a finished database structure.
Copy the example database (.mdb) and remove any write-protection, before you start an export. You can always edit and extend the access structure if needed, as long as you leave the existing tables as they are.
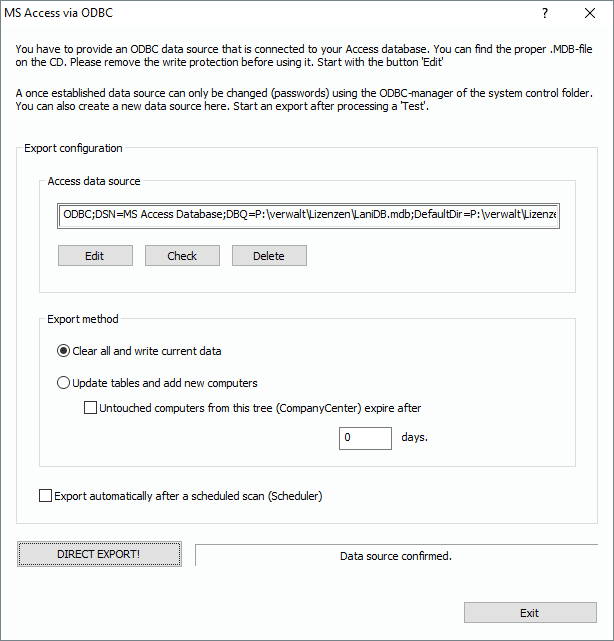
You need to establish an ODBC connection to the .mdb-database. Click on “Edit” to call up the system dialog for ODBC connections. Name the connection, choose the MS Access ODBC driver and provide the path to the lani.mdb file.
Once, the system has confirmed the new data source, you click on “Test”. If everything works fine, you can start your export and synchronize the data. To include the synchronization process in a scheduled plan, you need to perform the process at least once manually with success.
You can choose between two methods:
1. Empty all and re-write everything.
2. Analyze existing data, keep IDs. Drop computers with older scan date than ‘n’ days
The second method allows you to keep unique IDs for the computers. You can also specify an expiry date for computer records.